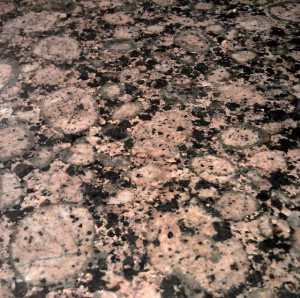
 Certain building materials emit or “outgas” levels of radioactive particles, such as granite countertops which release radon. You can test your granite countertops for radon to be sure how much gas is being released. For the most part, it’s highly unlikely that the gas being released is concentrated enough to be hazardous or harmful. In addition there are several environmental factors that work against the buildup of said gas, such as room size, ventilation and more. That said, if you’re really worried and would like to know the amount of radon gas your granite countertops are outgassing, you can purchase a simple DIY test kit.
To be perfectly honest, if you’re planning on testing your counters and you have yet to test the air in your home – you should do that first. Radon is the second leading cause of lung cancer in the US, responsible for the deaths of more than 20,000 each year. Since the health affects come from long-term exposure it can all be prevented with a simple test. Get on it.
Getting back to the counter test, we’re going to cover the steps to do so in full detail. Here, is how you can test your granite countertops for radon gas.
How to Test Your Granite Countertops for Radon
Yes, there is another type of test specifically designed to check the radon levels being released by granite. The do-it-yourself test kit can be purchase online or from various home stores. It should be noted that this is not a common product, so you may not be able to find it locally. If you want to test your granite countertops for radon accurately, you need to use the appropriate test – makeshift home solutions will not work.
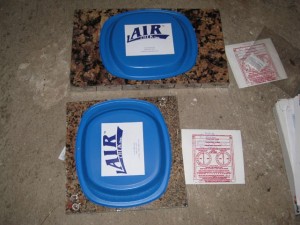
The setup basically works like this, you put together several sample packets and then rest them on top of your counter. You cover the packets and leave them to collect the necessary air sample. Then – just like a traditional radon test – you mail the samples to a remote laboratory and wait for them to return the results.
You must be absolutely sure that you follow all instructions for setting up the test packets and collecting samples. That includes taking note of the distance required between the packets. You’ll also want to avoid placing them near windows, doors or areas leading outside. You’ll also want to keep them away from high trafficked areas if at all possible.
One or two of the air sample pouches will need to be suspened a few feet above the counter too. If the kit doesn’t include plastic ties to attach them you’ll need to pick some up.
The instructions will tell you how long to leave the packets. It should also list mailing information for the laboratory along with any fees or payment details.
Note: You can also use a device like a Geiger counter to measure your counter’s radioactivity, however it’s not recommended. Readings and measurements taken with a Geiger counter are difficult for the average person to translate into usable data at least as far as radon gas and health hazards are concerned.
Test Your Granite Countertops for Radon, but the Gas is More Likely to Enter the Home Elsewhere
Countertop testing instructions aside, radon gas is more likely to enter your home through cracks in the foundation, walls and flooring. It’s a natural decay product of elements such as uranium, which happens to be abundant in soil.
Radon can be an issue in any home new or old. It doesn’t matter if your home has a basement, a second story or is manufactured. Often, new homes are built using radon resistant construction but the risk still exists. That is why you should test your home regardless of your geographical location, or residence type. Radon does not discriminate.


