When testing for radon gas, you do have the option to test yourself with a DIY testing kit. You can purchase those at any local hardware store or online, and they’re not very expensive. However, due to limitations in the testing process we always recommend hiring an experienced professional to do this for you. In addition, you’ll have to mail the samples to a remote laboratory where the amount of radon gas can be analyzed. There are many ways this process can be interrupted, for example if you don’t leave the testing kit out for long enough — or if you don’t seal them up properly.
It’s good to know the option is always there to do it yourself when testing for radon gas, but the reality is you should probably just hire a professional. Of course, that just relates to testing for radon gas. When it comes to mitigation and the removal of the deadly gas from your home, you should always hire an experienced professional.
Mitigation Law Requirements
While there are no laws that specifically address testing for radon gas in your own home, there are some states that prohibit anyone but licensed professionals from installing a mitigation system.
Just to offer a quick lesson, a mitigation system is a ventilation system used to pump concentrated amounts of radon gas out of a home and out into the open air where it can be dispersed more evenly. It often involves running a pipe-based system under the foundation slab of the home, and connecting it to an electric fan that blows the radon gas out of the home.
Since radon gas seeps up — it’s dense — through cracks in the foundation, walls and flooring it’s best for the mitigation system to ventilate it at the bottom layer.
Once a mitigation system is setup, it needs to be running constantly in order for the radon to remain ventilated. In this respect, it means the mitigation system must be operating to its highest capacity at all times. If you put in a mitigation system yourself — unless you happen to be a certified contractor — there’s a chance you won’t know how to fix the problem when something goes wrong. Worse yet, you could install a mitigation system that you believe to be working, but is only making things worse. How is this possible?
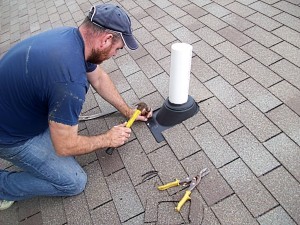
Generally, the pipes and ventilation system needs to run through the rest of the home and out of the roof. Resourceful contractors will run this pipe on the outside of the home, but sometimes it is passed through the interior. If there’s a leak in the pipe system the radon gas could actually be spread through the home. That’s why it’s best to leave the mitigation process to professionals.
Testing for Radon Gas Yourself
Now that we’ve addressed mitigation, we’ll get back to discussing the testing for radon gas process. What if you want to test yourself, and don’t trust a professional to give an unbiased and truthful reading?
Testing for radon gas in your home is entirely possible to do yourself, but you’ll need to follow a strict set of guidelines before and while doing so. Before you can start testing for radon gas, you need to understand how it’s done and what the different radon levels mean.
Let’s get started.
Testing for Radon Gas: Long Term and Short Term Tests
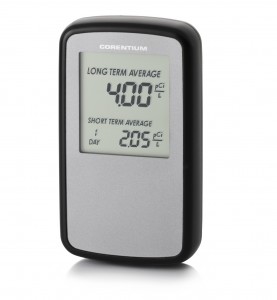
The two types of tests are related to the length of time it takes to get an accurate reading. Because radon levels are affected by many different variables, they can fluctuate at different times of the year. In that respect, short term tests only provide insight as to radon levels during the time of testing. Long term tests, on the other hand will allow you to track the levels of radon in your residence for an extended period of time. As a general rule, when testing for radon gas in your home it’s best to use both types of testing kits.
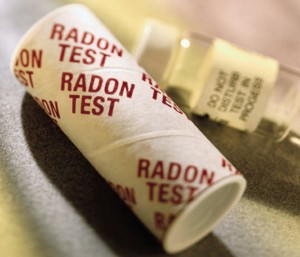 Short term tests call for a testing device that remains in the residence anywhere from a 2 to 90 day period. Long term tests remain in the home for longer than 90 days at a time. Radon contractors can perform both types of tests in your home, but more than likely will run several short term tests to gather a reading.
The EPA recommends that if the results are anywhere close to 4 pCi/L you should perform a follow-up test shortly after. Start with a short term test and if the results show elevated levels then retest using long-term standards.
Radon is measured in picocuries per liter of air, or pCi/L. The average outdoor level of radon gas is 0.4 pCi/L, while the average indoor level is approximately 1.3 pCi/L. As you can see, the recommended limit is much higher than both of those numbers. It is possible for any and all residences to maintain a level of 2 pCi/L or below. The recommended limit of 4 pCi/L is the absolute maximum radon levels should ever go inside any residence. Levels higher than that are extremely dangerous in terms of exposure. That’s why it’s important that you begin testing for radon gas in your home as soon as possible.
How to Start Testing for Radon Gas?
The first thing you need to do is purchase a radon testing kit. For a quick comparison on the different types and ratings, please visit our radon test kit comparison page. Once you actually have the testing kit in hand, you can follow the steps listed here to find out the radon levels in your home.
You will need to decide upon a proper testing location before you begin. It should be a room or area of your residence where you spend most of your time. It’s a good idea to test in the lowest levels possible, such as a basement or the first story of your home. Never place a test in a kitchen or bathroom, because it is possible to receive false results due to appliances and other variables.
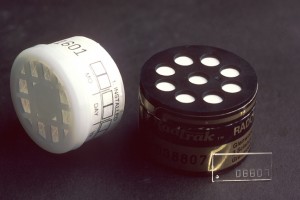 Most testing kits include two vials for collecting samples, and a form with information about a mailing address and prices. Once you have completed the testing period you will need to send the vials in the mail to a laboratory in order to receive results. Because of the mailing process the results can take a while to receive, which means if you need results in a shorter period of time you’re better off hiring a qualified radon tester or contractor.
Before you begin testing for radon gas in your home, you will need to lock down the entire residence. Leave all of your doors and windows leading outside closed and sealed for at least 12 hours prior to conducting the test.
Once you’ve done everything listed above you can actually begin testing for radon gas. You will need to place the two sample vials about 20 inches off of the floor, and six inches apart from each other. You can use a measuring tape to approximate the recommended distances.
After the vials have been placed, you can remove the caps. It is very important that you wait a minimum of 48 hours, but no more than 96 hours (two to four days) before placing the caps back on the vials. In addition, you should never disturb the vials in any way. Make sure you have placed them in a location where they will not be disturbed.
Try to avoid opening any doors or windows during the testing period and do not use any temperature coolers during that time, like air-conditioners or evaporative cooling units. As an added precaution, make sure any and all fans have been turned off in the residence. Again, it’s important that you do very little to disturb the air or vials inside the testing location.
When the time is up, place the caps back on the vials and send them to the appropriate laboratory along with the necessary resources – which is usually an information form and a check to cover applicable fees. It is recommended that you mail the vials within a day or two so that the lab can return accurate results.
The laboratory will either mail the results back to your home or post them online, depending on the service and brand you’ve chosen for your test.
Obviously, if you hire a professional and they begin testing for radon gas you will need to follow the same steps listed here but someone else will be conducting the air collection duties.
How Accurate Are Radon Testing Kits?
This is actually a difficult question to answer. The testing results can be easily swayed by a lot of different variables. The results are largely going to depend on the length of time you spend collecting samples, the time it takes for those samples to reach a lab or testing facility, and what the air situation is like in the testing residence. Simple things like opening doors or windows, or shuffling around the air inside a residence can cause testing anomalies and inaccurate results.
It’s also important to do multiple tests when you find there are elevated radon levels in a residence.
How Often Should You Be Testing for Radon Gas?
The radon levels can be affected by a great deal of things such as the current season, home improvements or appliance additions, living patterns and much more. It is important to perform a test whenever there is a change in your home. If you move from one level of the home to another, you should also perform a test to be sure the conditions are safe. Always remember to test the lowest levels that you live on, because radon gas is dense.
It is recommended that you start testing for radon gas in your home at least twice a year, similar to annual medical or dental check-ups. In the event that the levels are found to be high, it warrants at least one or two more tests so that the results can be compared.
To see a list of one time short term radon tests vs long term and continuous monitoring, check out our radon test comparison page.
How To Tell When Radon Levels Are Too High
According to the EPA, any amount of exposure to radon gas is unhealthy. If the levels in your residence are higher than 0.4 pCi/L you should look into proper radon mitigation procedures and methods.
The national average of outside radon levels is approximately 0.4 pCi/L, which is why the number was listed above as a reference point for mitigation. Depending on where you live, the levels outside of your home may be as high as 0.75 pCi/L. According to the National Academy of Sciences, outdoor radon levels cause approximately 800 of the 21,000 radon induced lung cancer deaths in the US each year. Furthermore, the risk of lung cancer increases significantly at higher radon levels. Lung cancer risk increases about 16% per every 2.7 pCi/L.
The US EPA has set an action level of 4 pCi/L, which means if the levels in your residence meet or exceed that amount you should take action immediately. While testing for radon gas, if you find levels to be that high you NEED to hire a professional so they can install a mitigation system in your home.
What To Do When Testing for Radon Gas Reveals Elevated Levels
If the radon levels in your home or residence are elevated then you must take action as soon as possible to reduce the presence of gas in your home. The first step in that process is selecting or hiring a certified radon mitigation contractor. A radon contractor will analyze your residence and help you decide the best method for radon gas reduction.
 The type of residence and overall design will determine what kind of reduction system is going to be most effective. More specifically, the foundation of any residence will significantly impact the reduction method.
In houses with a basement, or crawlspace radon is reduced through four different types of soil suction: sub-slab suction, drain tile suction, sump hold suction and block wall suction. Sub-slab suction is actually one of the most common and most effective radon reduction methods. It involves running suction pipes below the floor or foundation directly into crushed rock or soil. The system basically vents out the radon gas before it can travel anywhere else.
Another method involves a device called a heat recovery ventilator (HRV), or air-to-air heat exchanger. It essentially creates ventilation to the outside by introducing fresh air into a residence, cooling or heating the new air at the same time. HRVs are actually more effective in confined areas like a basement, and must only be used when radon levels are well below 10 pCi/L.
You may or may not choose to seal your home better, but it should be noted that this will not reduce existing radon levels. Instead, sealing a home will only make a radon mitigation system more effective and should help prevent future gas from seeping in. It should never be used as a single method in radon reduction strategies.
Once a radon mitigation system is in place, you must also monitor and maintain it. It is an important part of the radon mitigation process even though it’s considered an extra step. Subsequent testing for radon gas in the home is required to ensure the mitigation system is working properly.

